Create AI Task
The AI Tasks page offers over 20 built-in AI Tasks designed for people and vehicle monitoring, safety, and security.
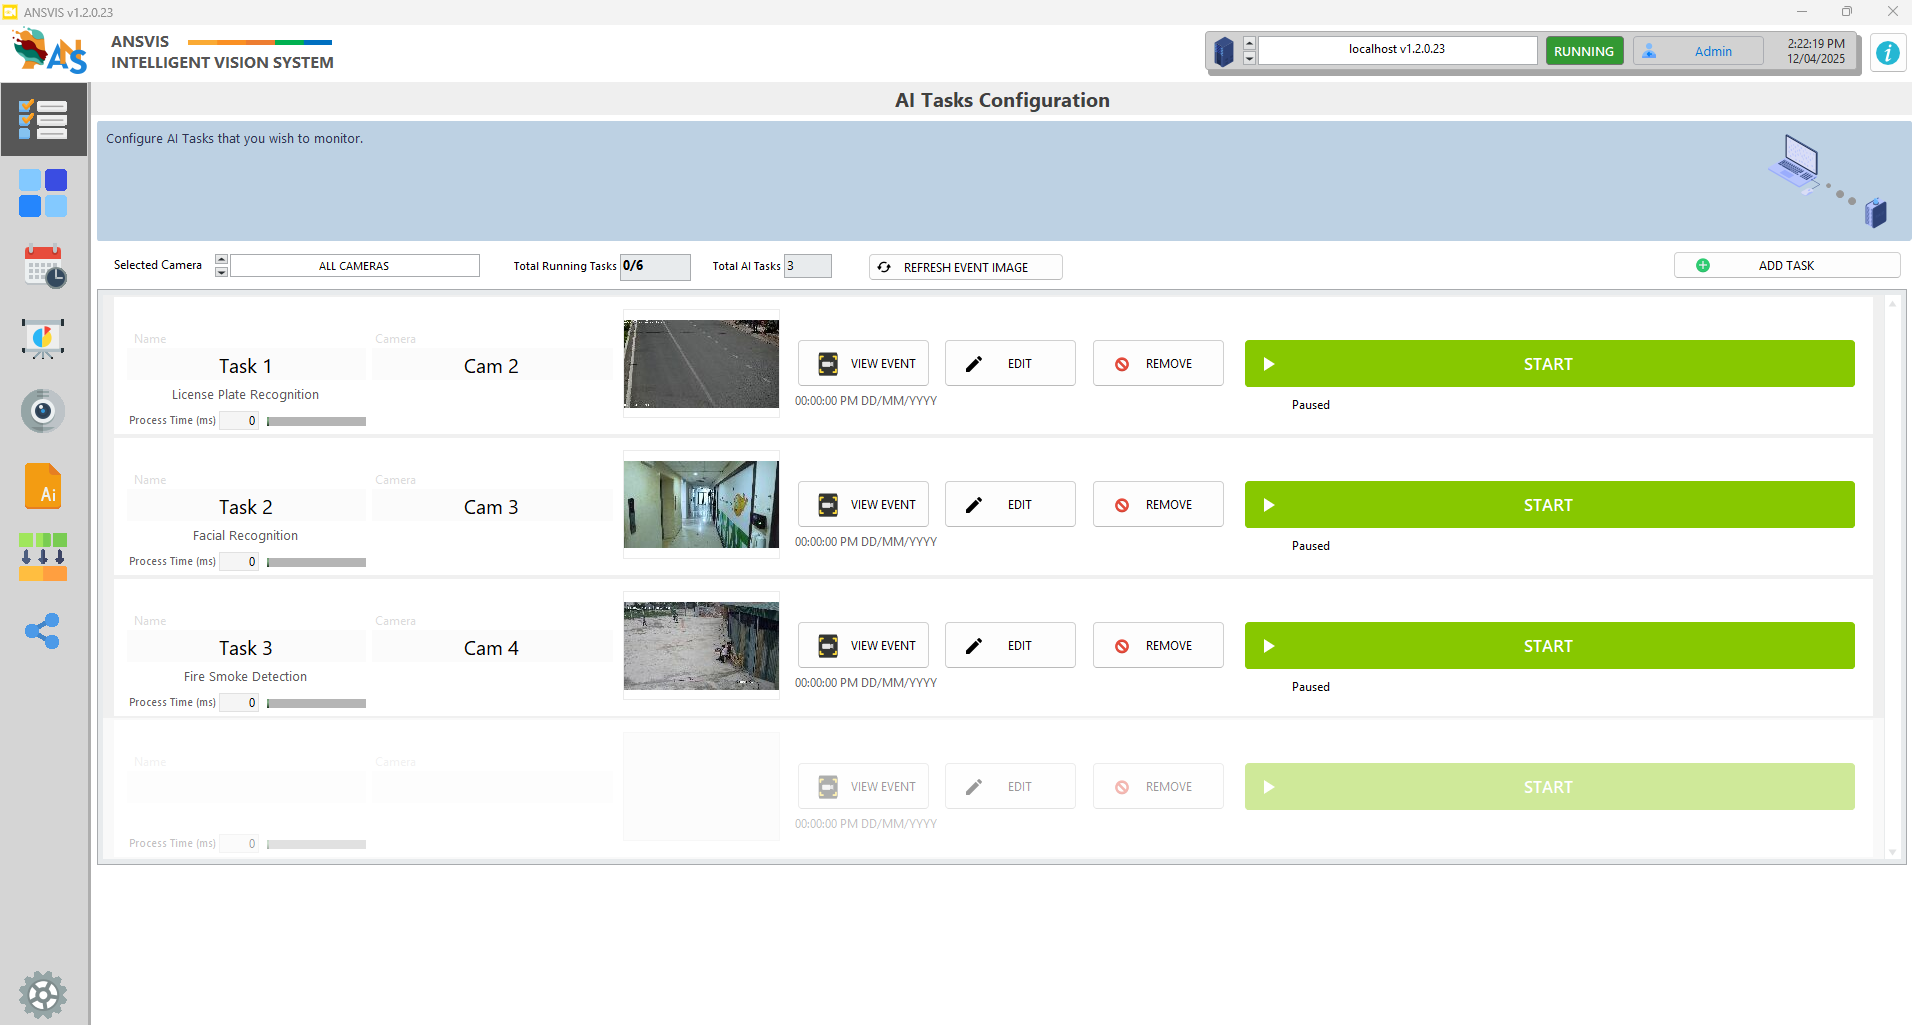
Once you have a Camera added to the ANSVIS Server, press Add Task to begin. You will then be prompted to the AI Task configuration page.
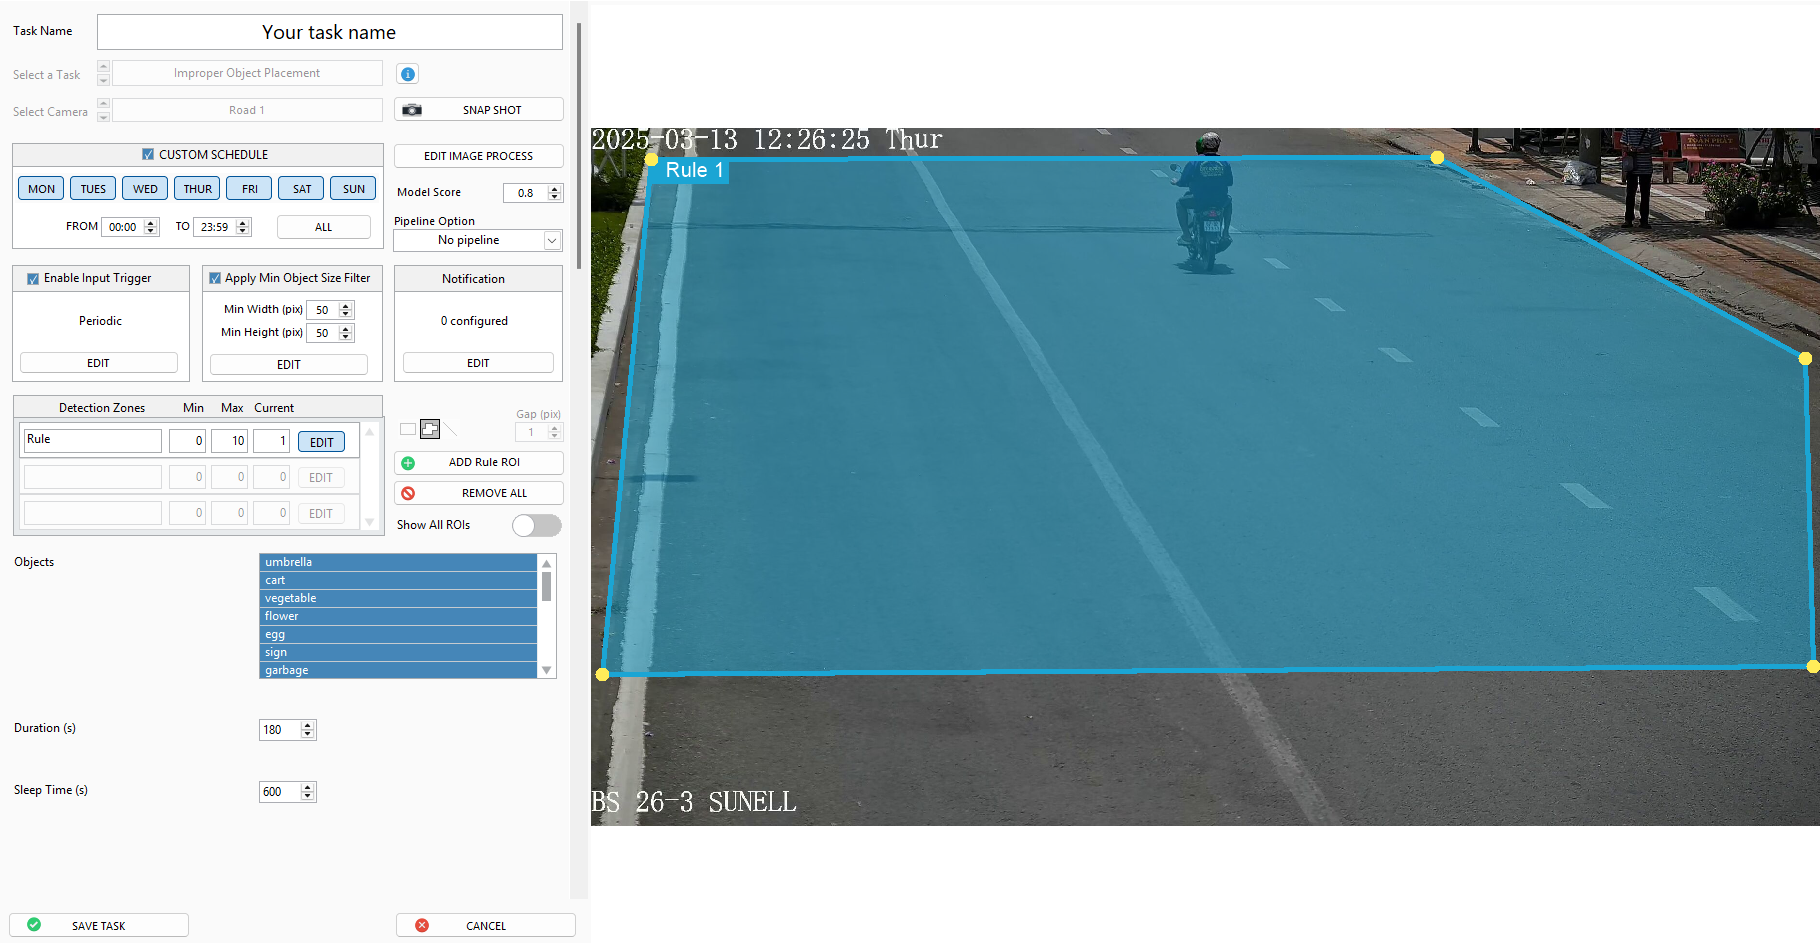
Select AI task and camera

- Give your task a name in the
Task namefield - Select AI Task from the
AI taskdrop-down list. Click theiicon to view task description. - Select the camera you want for this task. The camera preview image will be displayed on the screen, press
Snapshotbutton to refresh the image
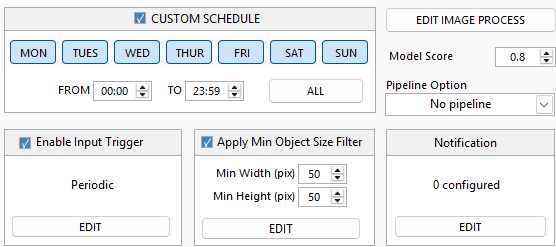
Configuration
-
Schedule: Set the time and day you want the system to trigger event, uncheck if you want the system to trigger event 24/7
-
Image Process: Press Edit Image Process to adjust the camera image before sending for AI analysis.
-
Model Score: Adjust the model score to improve the detection accuracy
-
Pipeline Options: Read extra information of detected objects (if visbile)
- No Pipeline: No extra information is required
- ALPR: Detect license plate information of the object
- OCR: Detect text information of the object
- Barcode/QR: Detect Barcode/QR information of the object

-
Input Trigger: Enable input trigger to execute the task only at certain conditions. Disable to run the task all the time.
-
Min Object Size: Enable if you wish to limit the minimum size of the detected objects. Press
Editto display min object size overlay in the image and adjust it visually -
Notification: Press Edit Notification to enable integration with third-party systems or prompt specific responses when an event occurs.
-
Detection Zones: You can define a detection zone (Region of Interest/ ROI) to monitor objects within specific areas or directions rather than monitoring the whole image. Each AI task may have different type of zones provided, and some AI task will require you to add zone
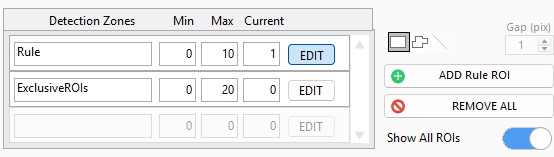
- Refer to the Min/Max/Current value to know which zone type you can/must add
- Press
Editto select a zone type - Select a shape (Rectangle, Polygon, or Line) and press
Add Rule ROIto add the shape overlay to the image - Adjust the shape using the overlay. For Line shape, you can specify
Gapvalue to increase line thickness and reduce false detection when object wanders around the line.
-
Additional Parameters: Each AI Task will provide dedicated parameters, refer to task description in the software to learn more.