Luxriot Integration Guide
This guide provides step-by-step instructions for integrating the Luxriot Video Management System (VMS) with the ANSVIS application.
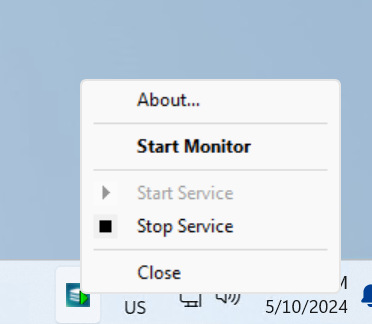
Launch Luxriot Server
Ensure that the Luxriot Server is running before proceeding with the integration steps.
Add Cameras to Luxriot Console
You can refer to Luxriot EVO Guide for more detailed instruction
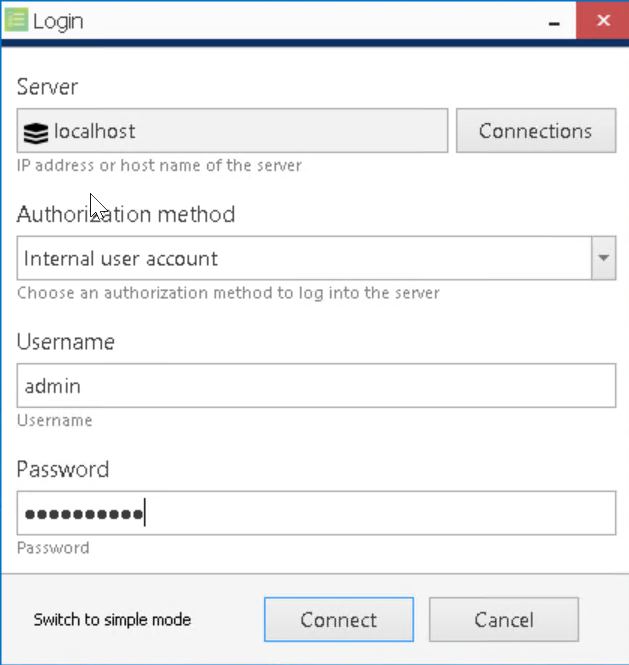
Login to Luxriot Console
Open the Luxriot Console application and log in with your credentials.
Add IP Cameras Using Autodiscovery
Use the automatic device discovery feature to find all available devices. This method is of great help when dealing with large amounts of cameras, and also when exact addresses of devices are not available.
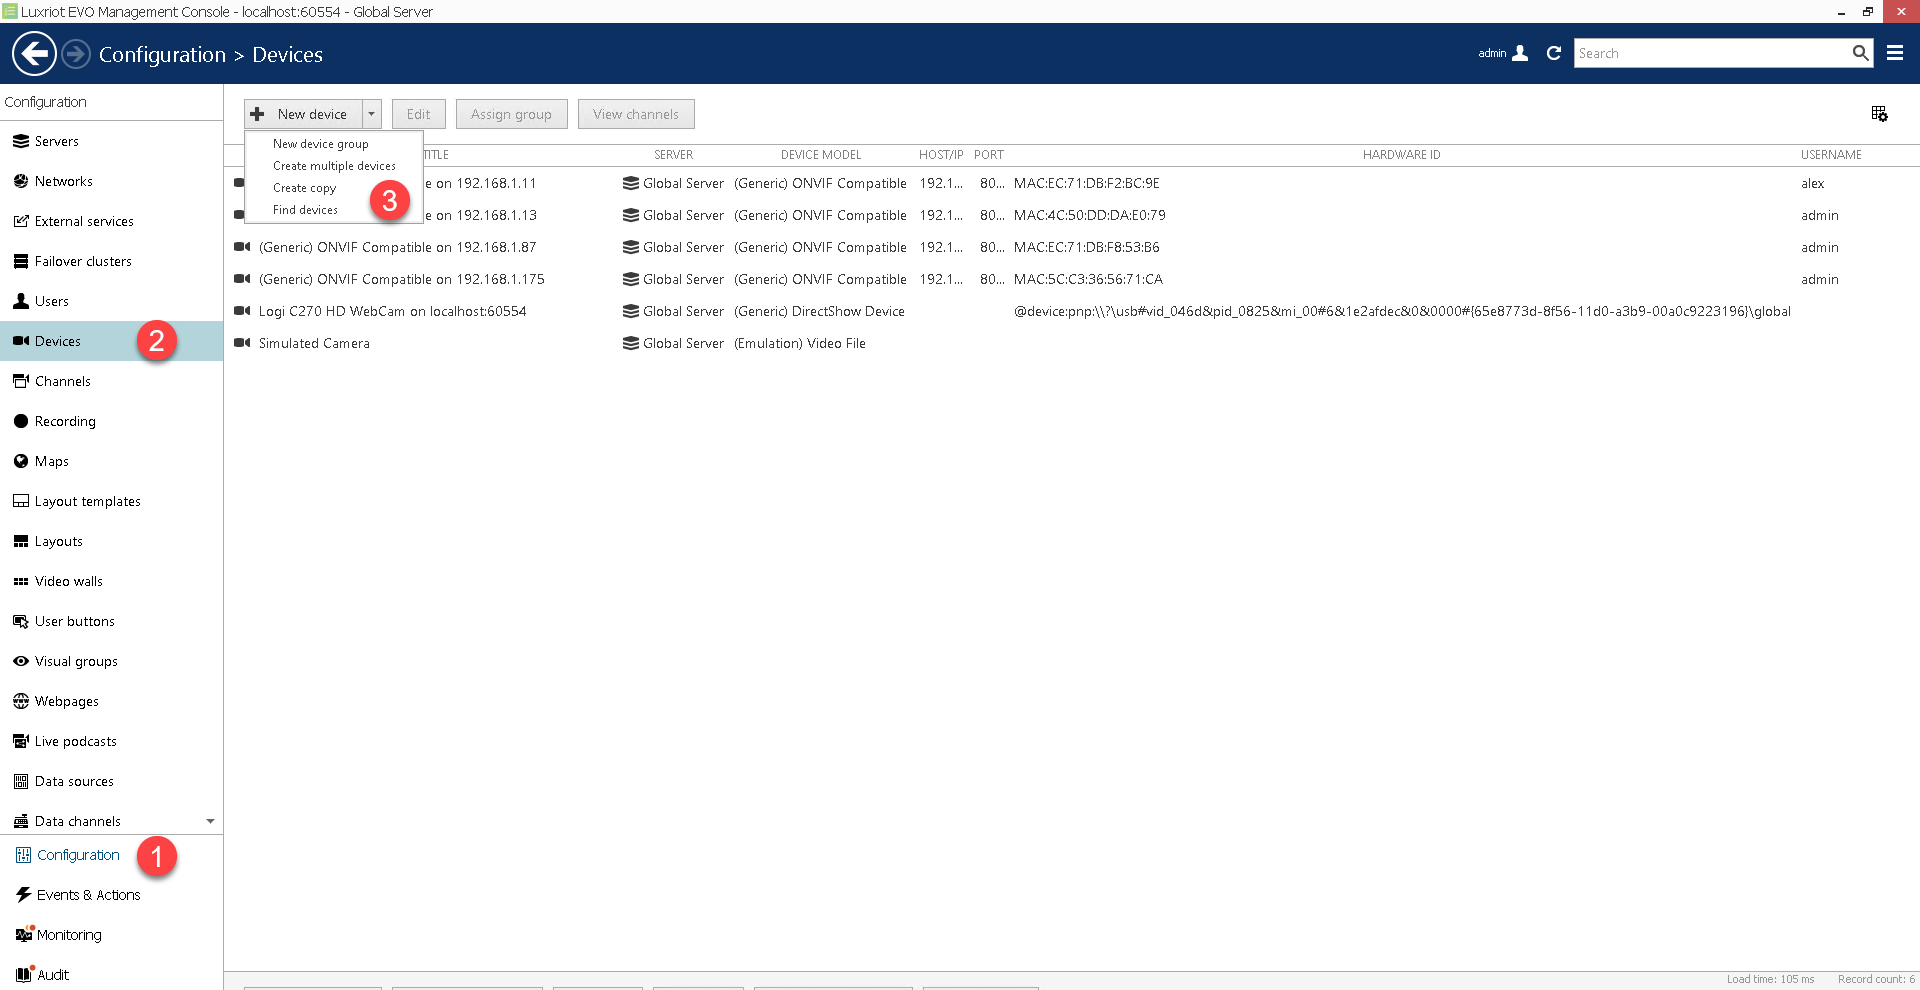
- Navigate to the
Configurationsection. - Select
Devicesfrom the left-hand menu. - In the upper panel, click the down arrow next to the
New Devicebutton and selectFind Devices.
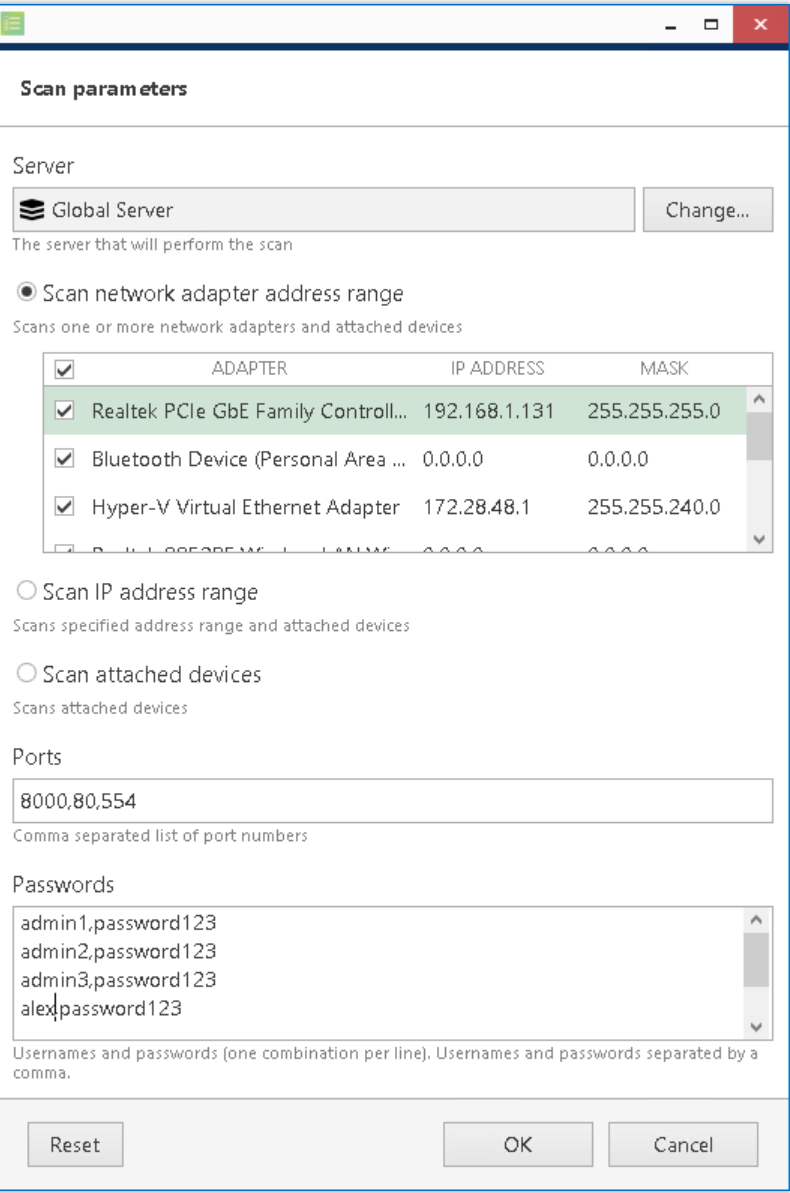
- In the scan parameters dialog:
- Select the appropriate
Scan Mode. - Add
ONVIF Ports(commonly 8000, 80, or 554). Refer to your camera vendor's manual for correct port information. - Enter the list of camera Usernames and Passwords.
- Select the appropriate
- Click
OKto begin scanning.
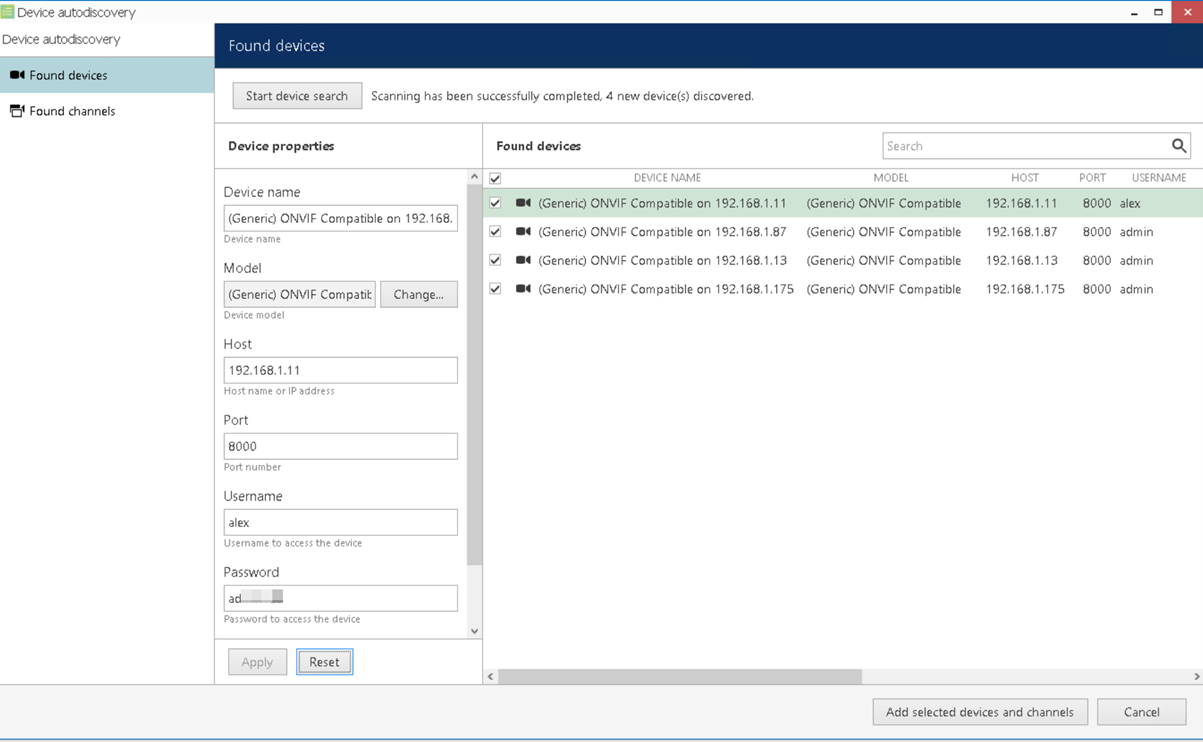
- After scanning completes, review the found devices and their channels.
- Select the devices you wish to add by checking the boxes next to them.
- Click
Add selected devices and channelsto complete the addition.
Add Simulated Cameras
Simulated cameras allow the use of a video file as a video source. Video files must be in AVI format, encoded as MPEG4 AVC h.264; video files exported from Luxriot EVO Monitor or Portable Player will work, too, provided that they were exported as AVI with JPEG compression.
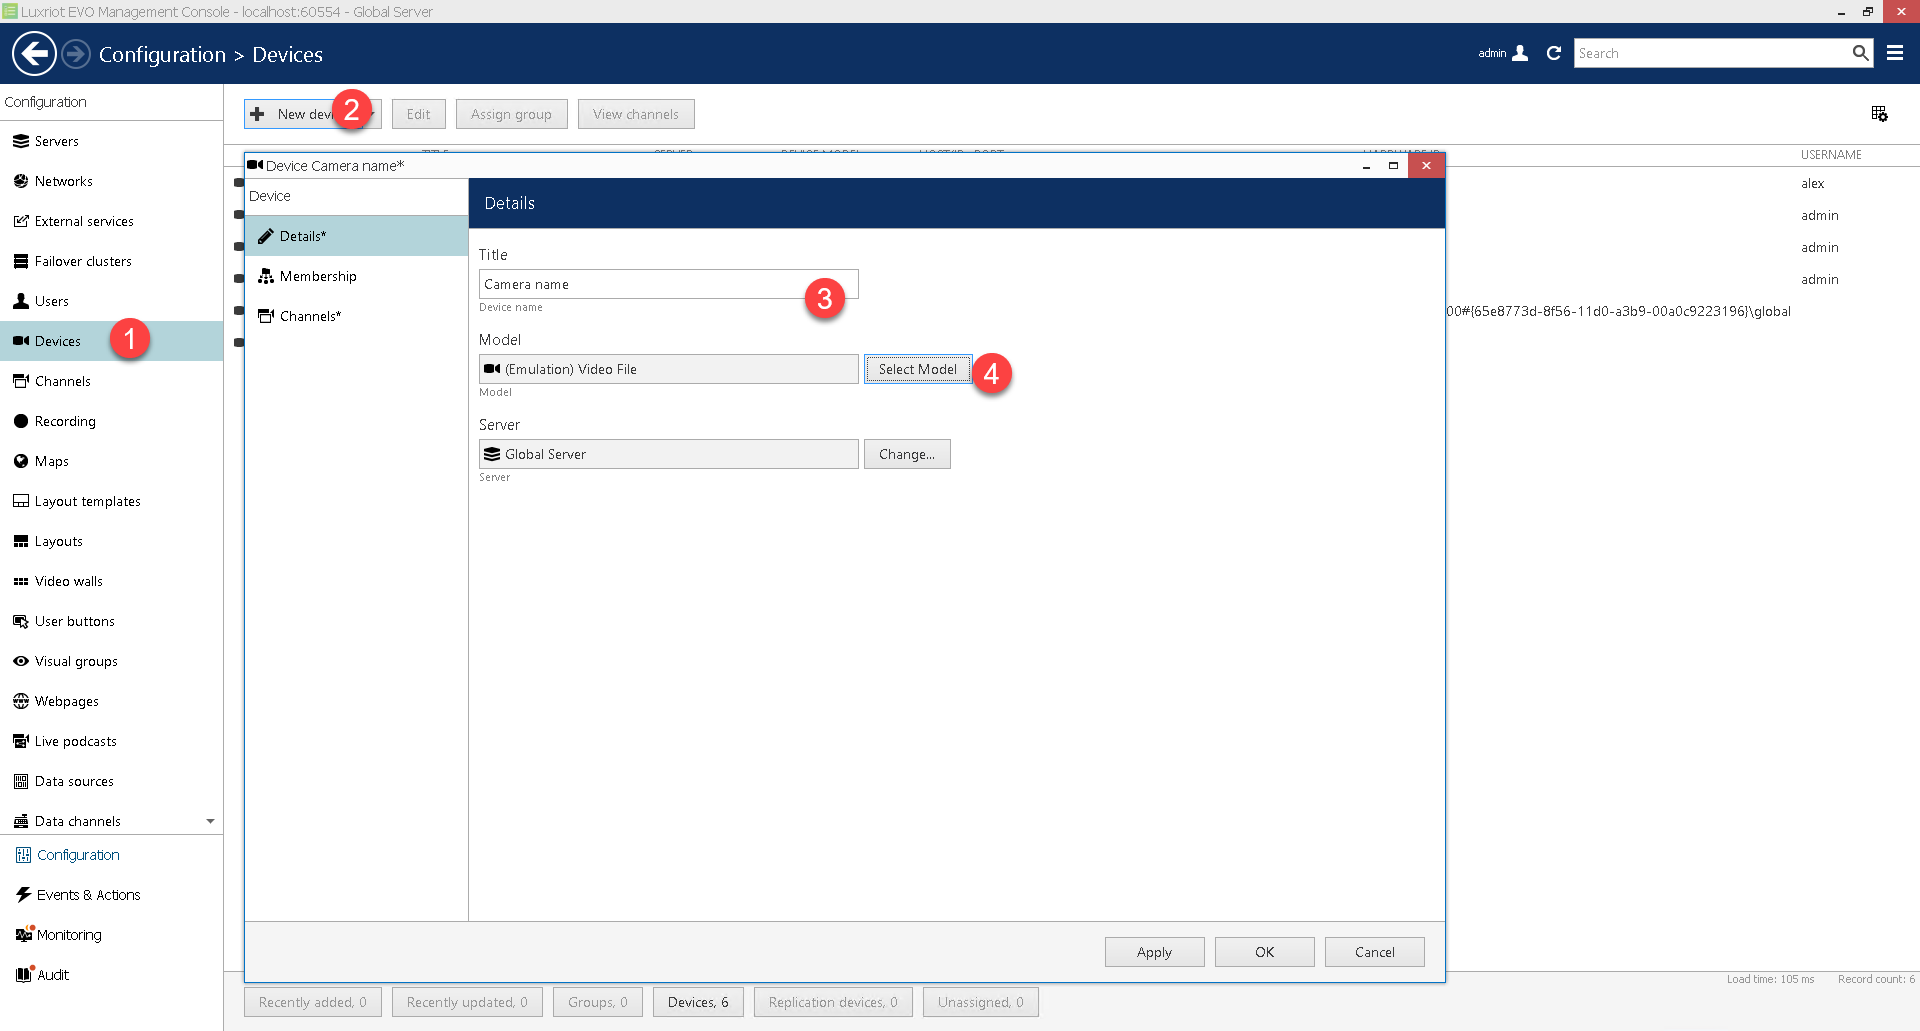
- Navigate to the
Configurationsection. - Select
Devicesfrom the left-hand menu. - Click the
New Devicebutton to open the device creation dialog. - Enter the
Camera Name. - Select the Camera Model as
Emulation (Video File). - Click OK to submit.
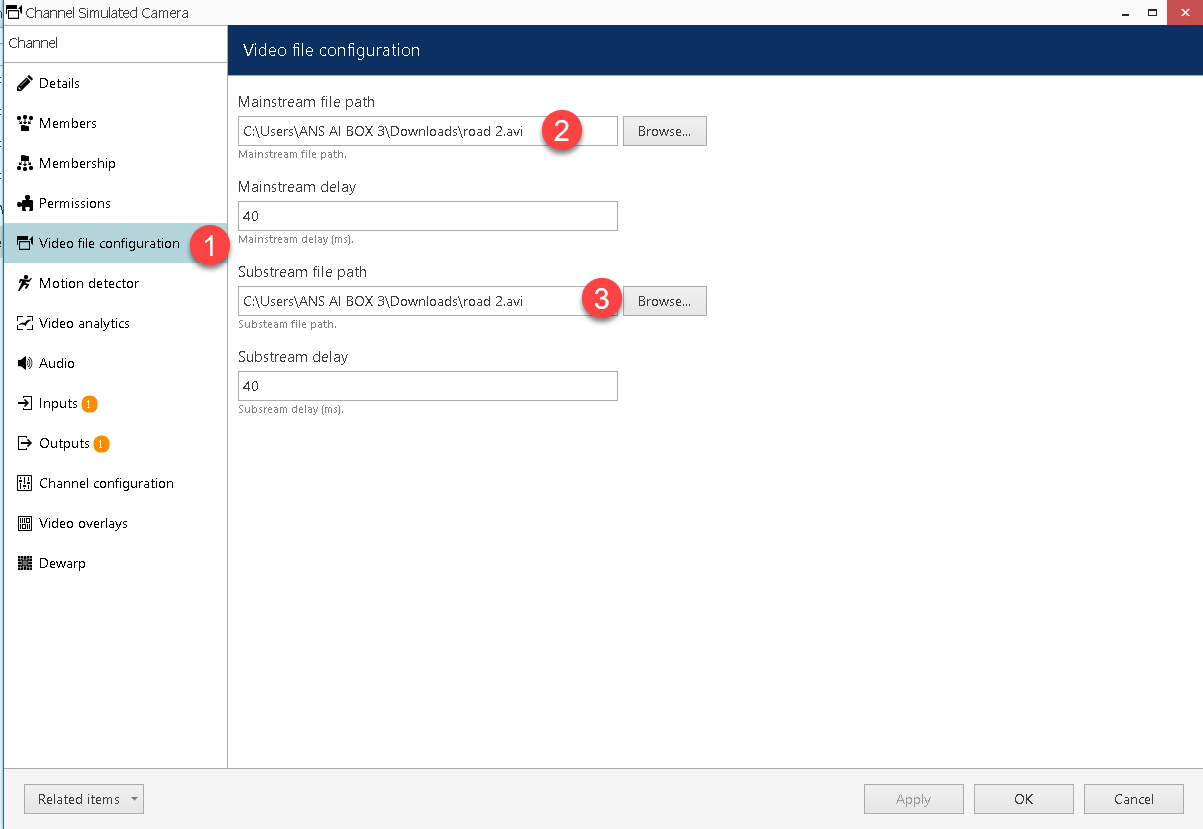
- After creating the emulation device, go to its channel's properties.
- Specify the full local path to the target video file.
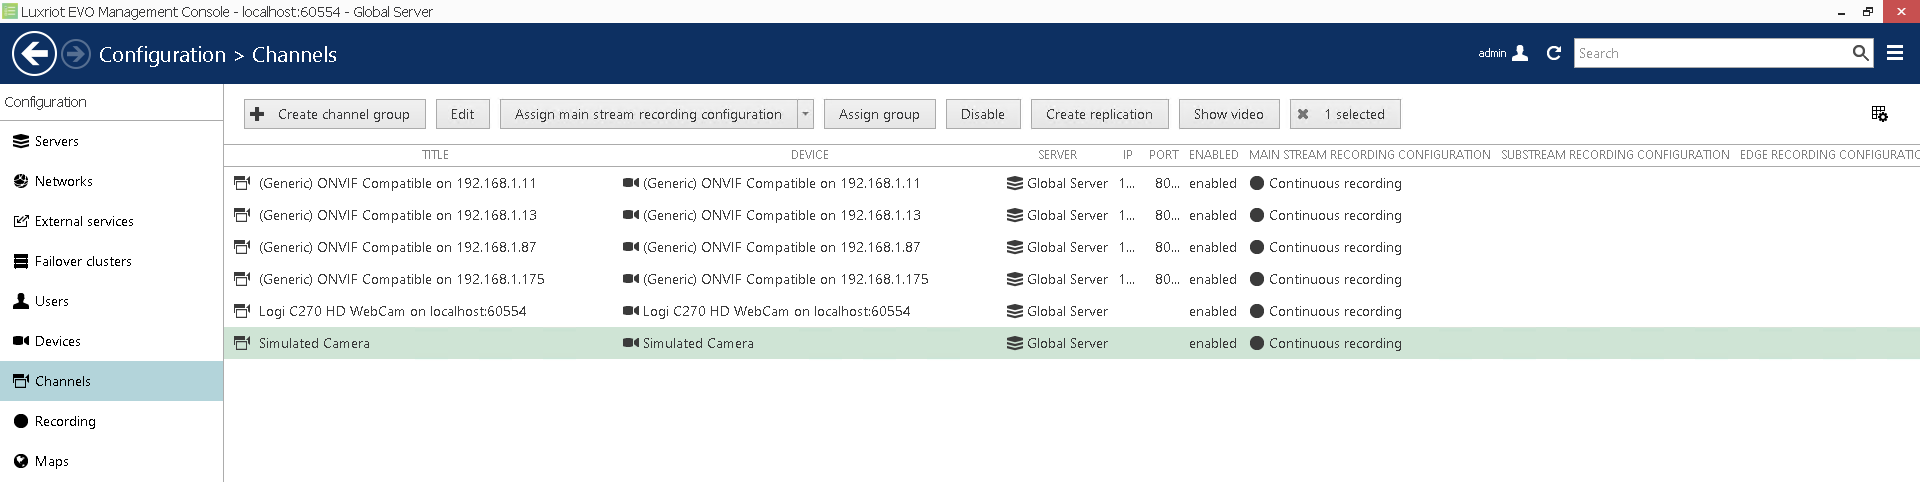
Manage Devices and Channels
Device and channel management are accessible via the Luxriot EVO Console Configuration section, by choosing the Devices or Channels category in the menu on the left
Register ANSVIS as an External Service
Register ANSVIS External Service via ANSVIS Application
By default, the Luxirot Server does not have ANSVIS external services. To register an ANSVIS external service, access the VMS setting from ANSVIS
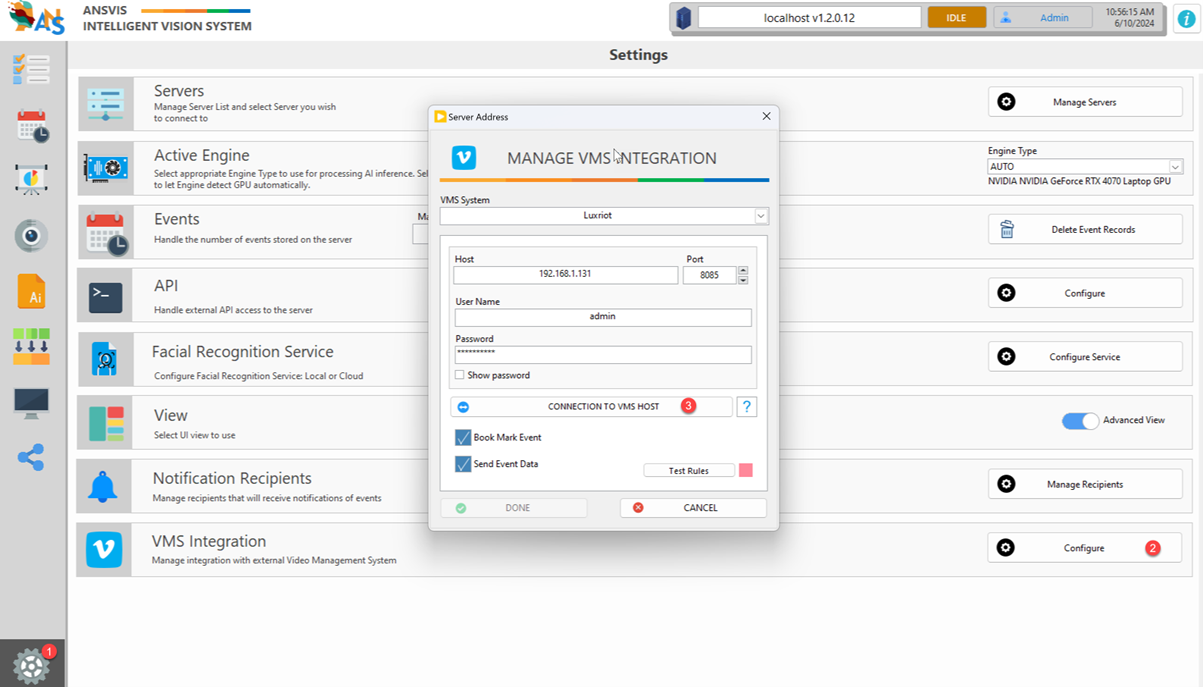
Enter detailed information about the Luxriot Server then Click Connection to VMS Host, and ensure that the connection is successful.
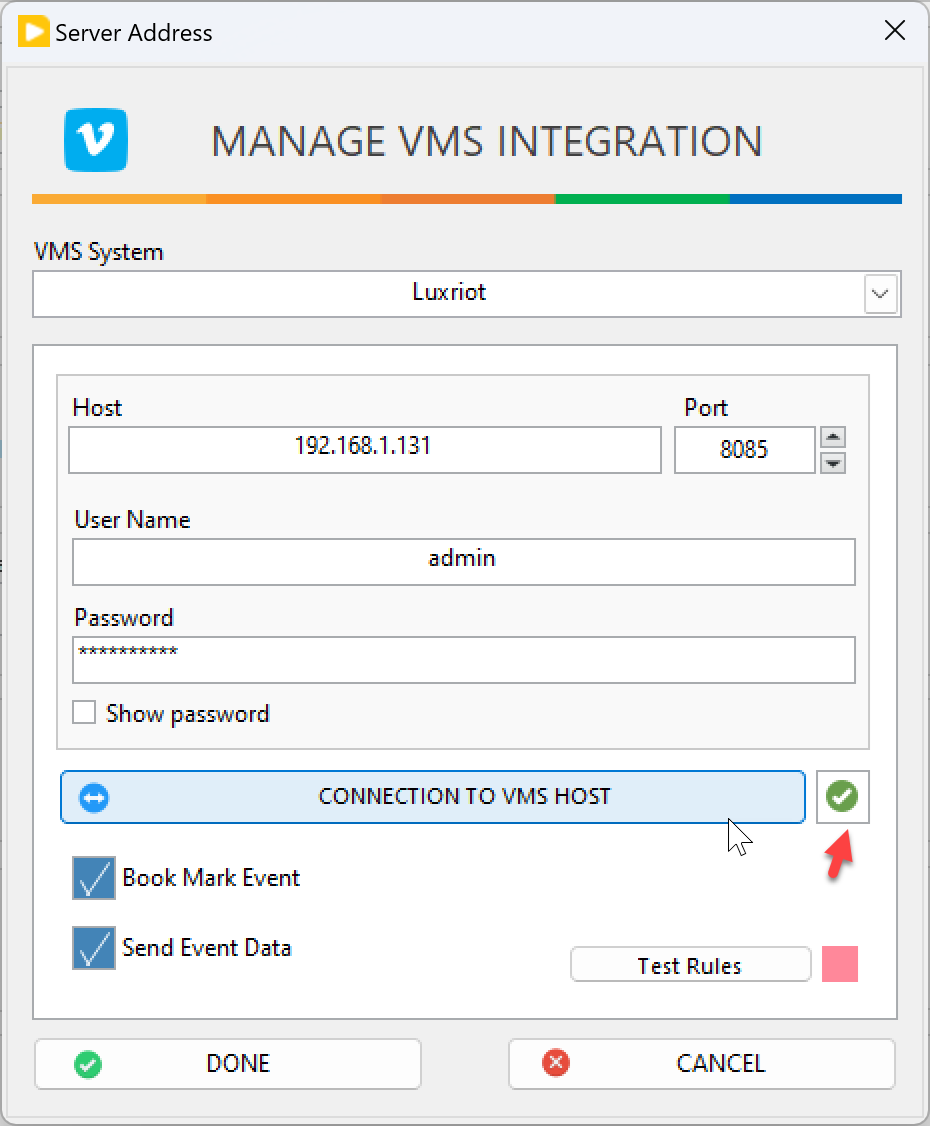
To validate this connection, please go back to Luxriot Console to verify that ANSVIS External Service has been added.

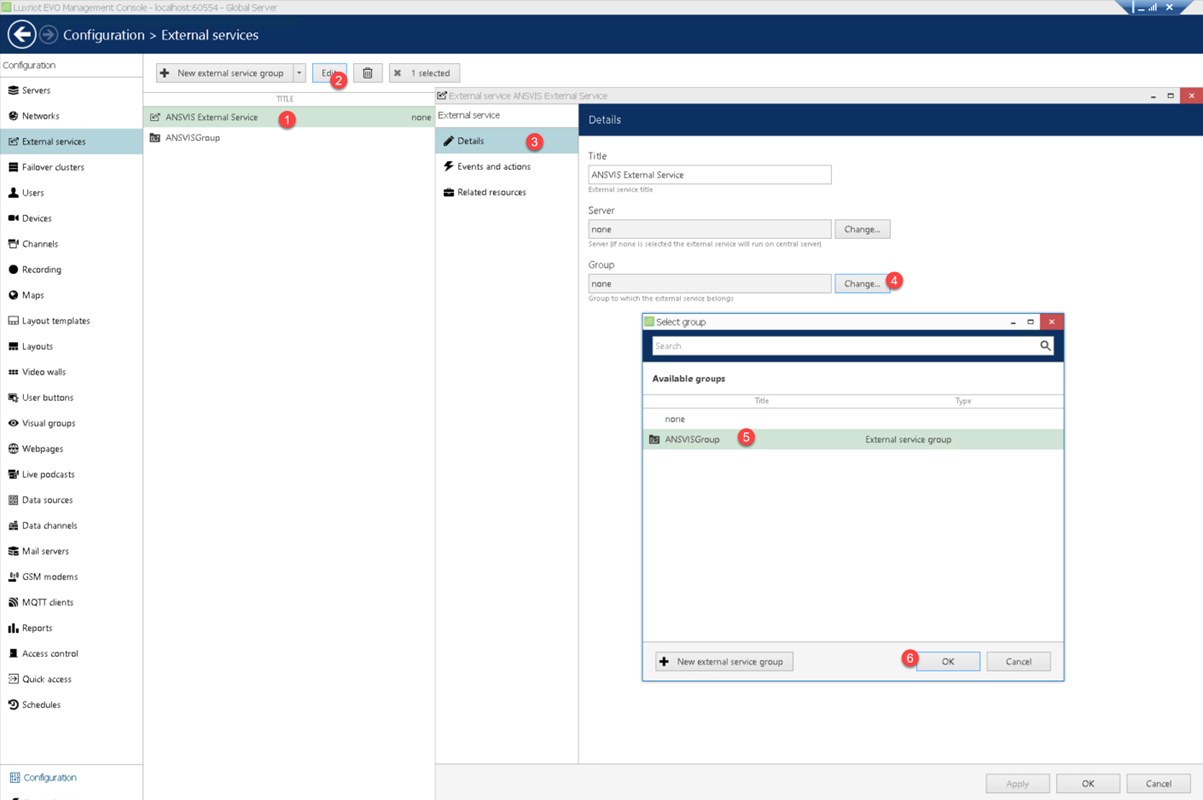
Add External Service Group to ANSVIS External Service (One-Time Setup)
In the Luxriot EVO Management Console, create an External Service Group.

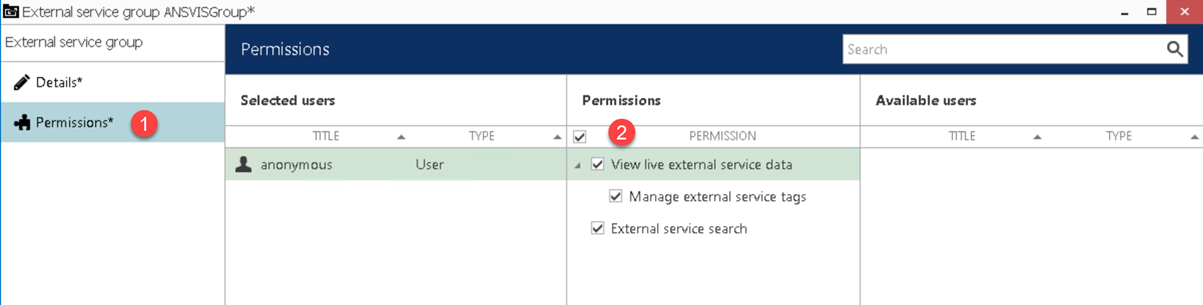

To add ANSVISGroup to ANSVIS External Service, select ANSVIS External Service and click the Edit button as follows:
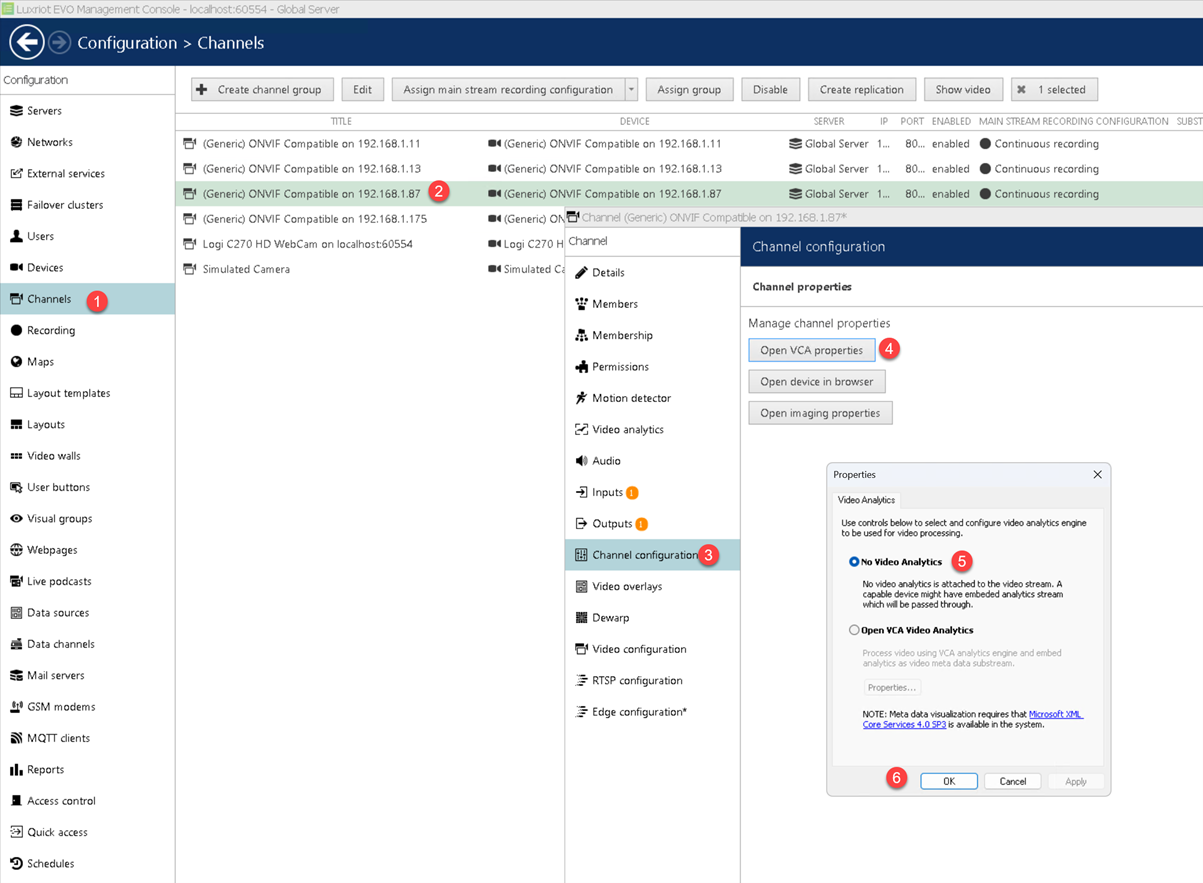
Disable Video Analytics for Selected Camera Channel
- Navigate to the specific
Camera Channelsettings. - Locate the
Video Analyticsoption. - Disable the
Video Analyticsfeature for the selected channel.
Test ANSVIS Trigger to Send Alarms to Luxriot Server
Launch Luxriot Evo Monitor
- Open the
Luxriot Evo Monitorapplication. - Select the appropriate layout from the
Layout Template.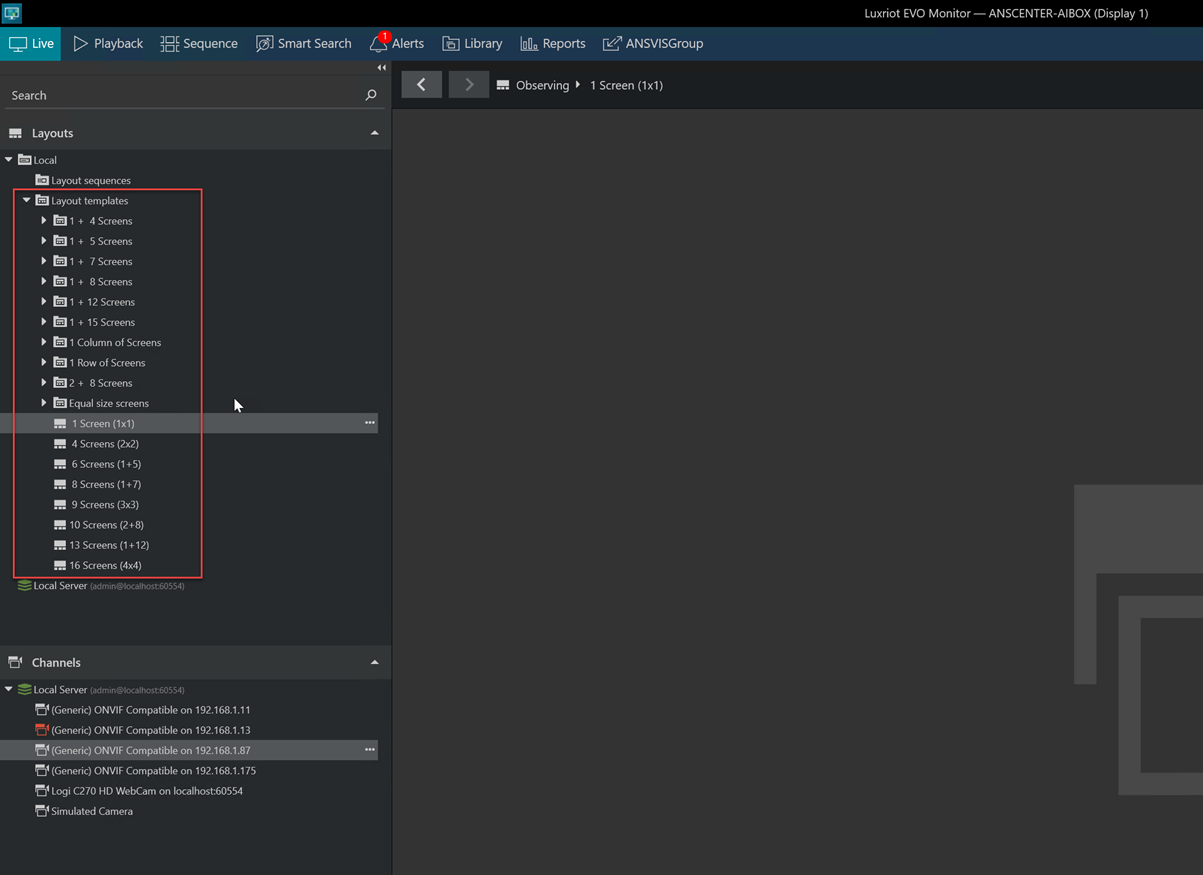
- Choose the channel to be displayed on the layout.

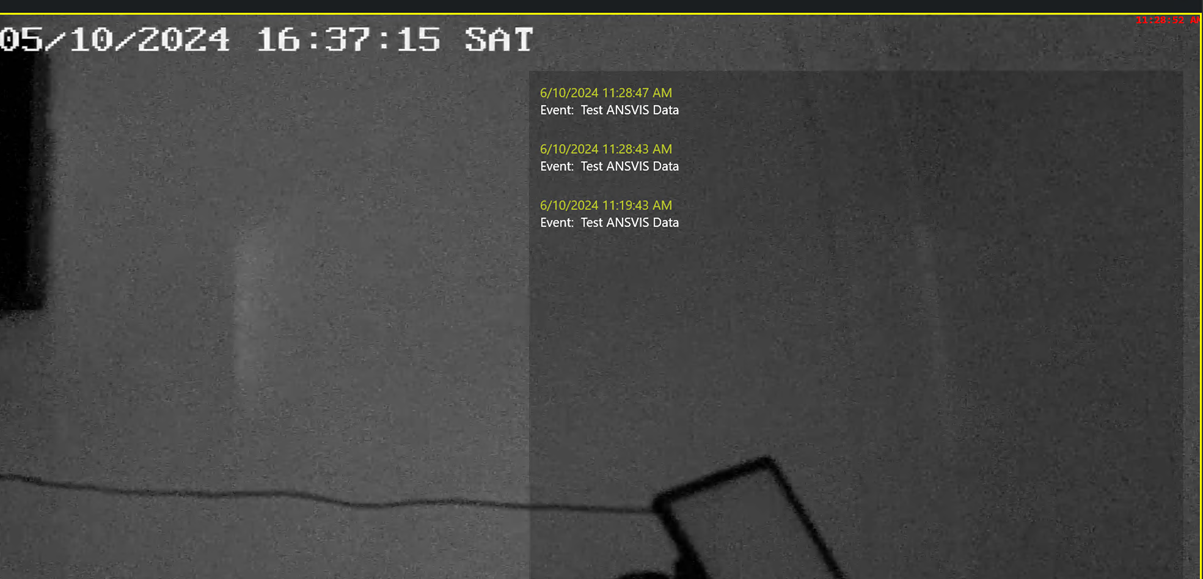
- Activate the Notification Panel by clicking on the
bellicon: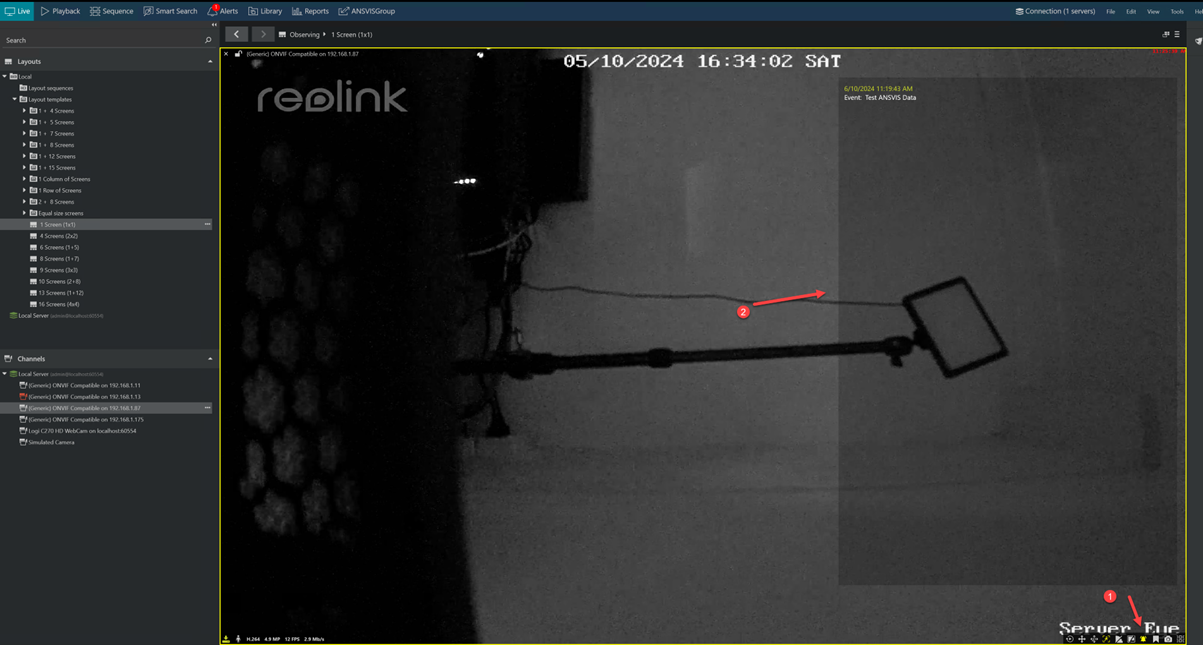
Send Test Alarm from ANSVIS
- In ANSVIS, navigate to the
VMS Integrationdialog. - Click on the
Test Rulesbutton to send a test alarm to the Luxriot Server.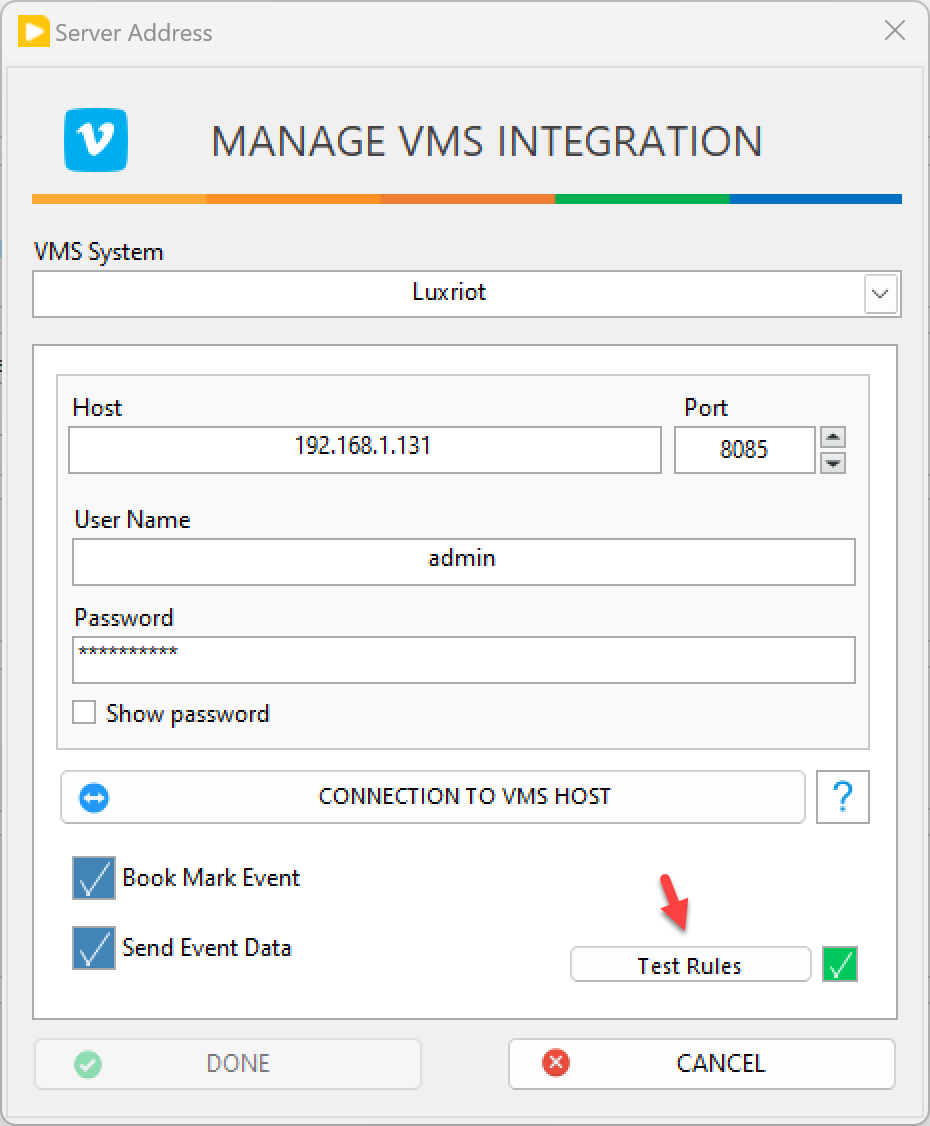
- The test alarm information will be displayed on the Notification Panel indicating that the connection between the ANSVIS and Luxiriot Server is successful.